Dungeon Crawler Carl Halloween Costume
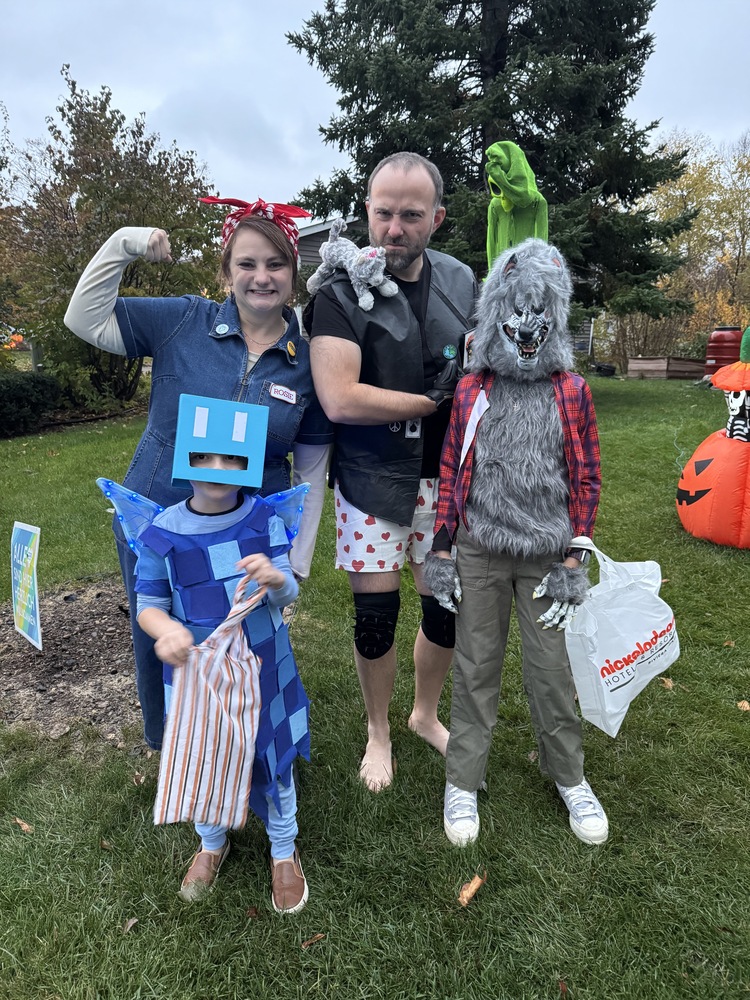
For Halloween this year, I went as Carl, the titular hero from my current book series obsession: Dungeon Crawler Carl.
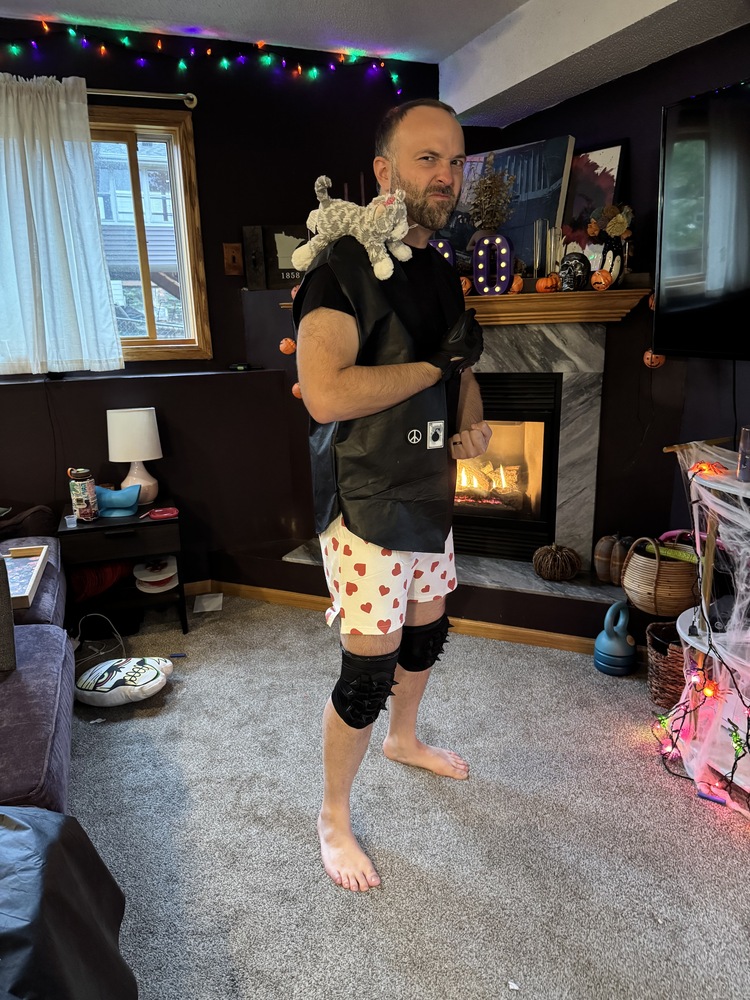
For this outfit, I enlisted the help of my wife, who apparently is a secret master seamstress. She sewed her first ever garment last week: a custom costume for my son who wanted to go as an allay from Minecraft. After seeing the impressive results from that, it didn't take much to convince her that a she could also whip up a pleather vest.
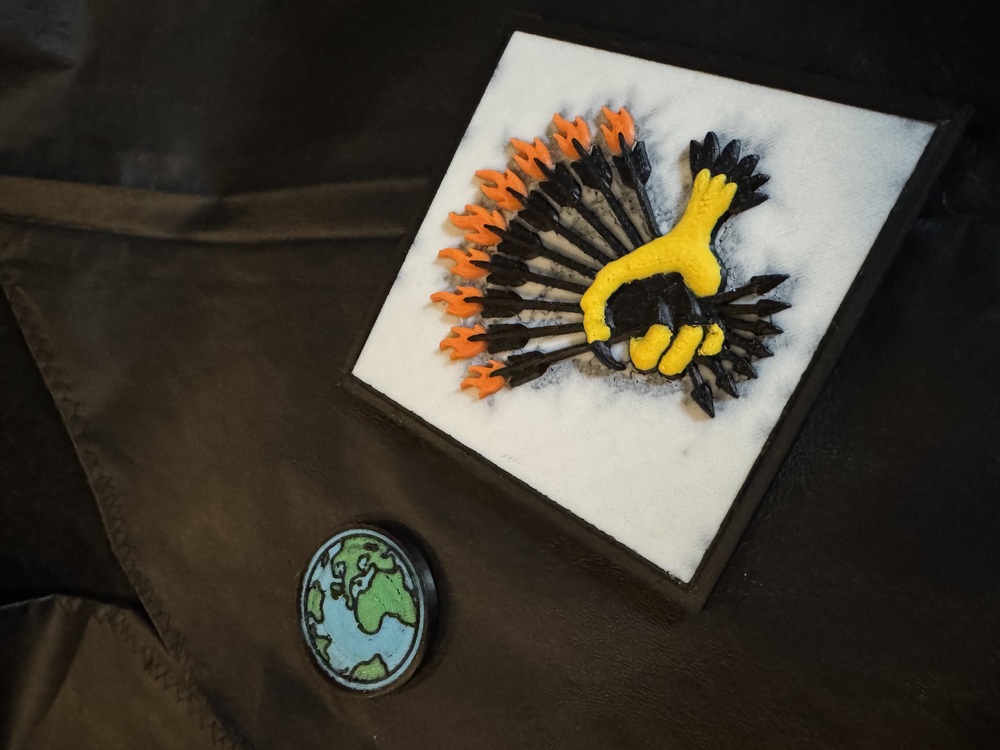
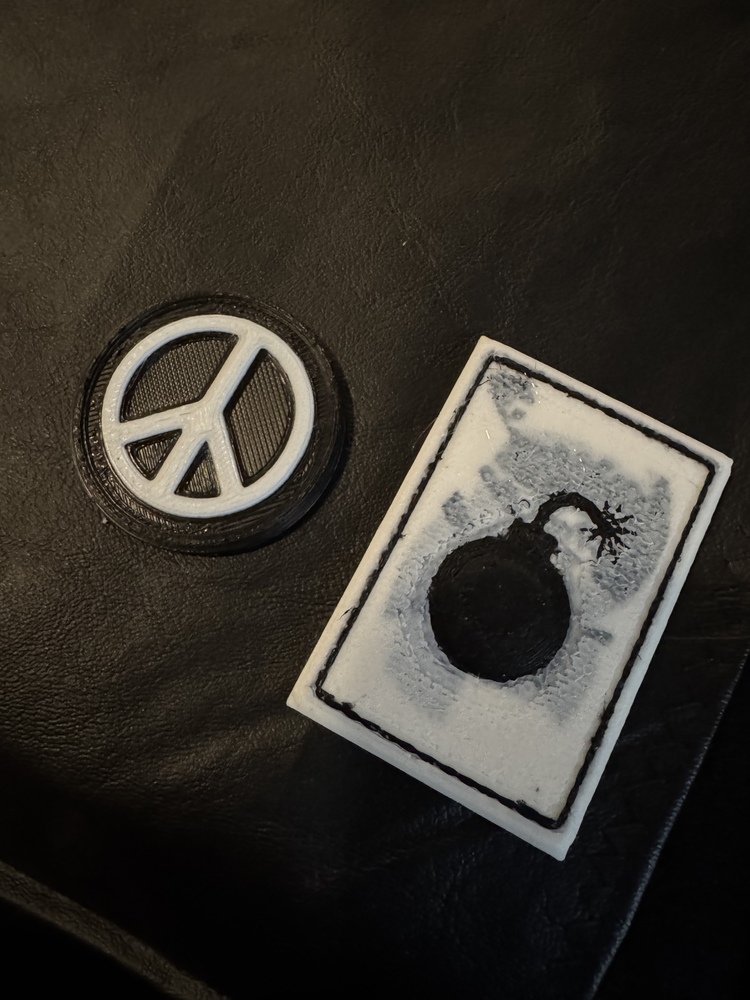
The vest is covered in upgrade patches that Carl earns as he progresses through the dungeon. I created several upgrade patches, including the earth, Skyfowl, peace, and bomb upgrade patches.
To make these, I spent a little time formulating a reusable prompt with ChatGPT, like this:
You are an expert visual concept generator creating embroidered patch–style relief designs for a DIY Dungeon Crawler Carl costume.

The output must look like a tactile, 2.5D embroidered patch with clear raised textures suitable for sculpting or casting.

Core visual style:
* Photorealistic embroidered patch on dark fabric (black or charcoal).
* Central circular composition with a stitched border.
* Detailed relief-like subject rendered in thread — clear contours, raised lighting, visible stitch texture.
* Lighting from upper left to emphasize shadows and depth.
* Materials: matte thread with subtle sheen, realistic fiber detail.
* Color palette: mostly monochrome or metallic (grays, bronze, steel) with one accent color (like orange, red, or teal).

Do NOT include: background scenery, text, labels, extra borders, or photographic backgrounds.

Goal: The result should look like a real embroidered patch photographed under studio lighting, with sculptural clarity and texture definition appropriate for converting into a physical relief sculpture.
Now apply this to the following patch concept:

“Earth Upgrade Patch: A tiny, round patch depicting the planet earth. Is about the size of a half-dollar and is screen-printed, not embroidered. Should look “amateur hour”.”
I cribbed the patch descriptions off of the excellent Dungeon Crawler Carl Wiki.
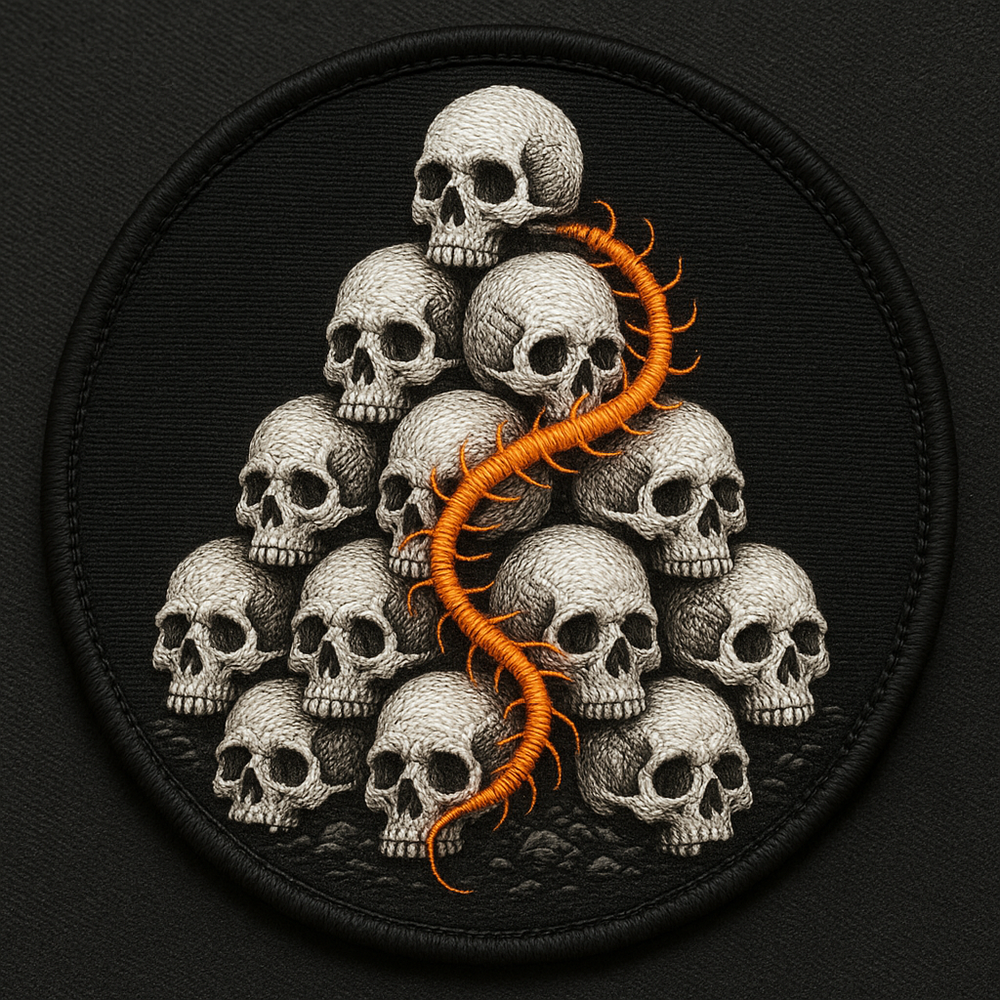
I then fed the prompt through ChatGPT and after a little back and forth, would result in an image like this:
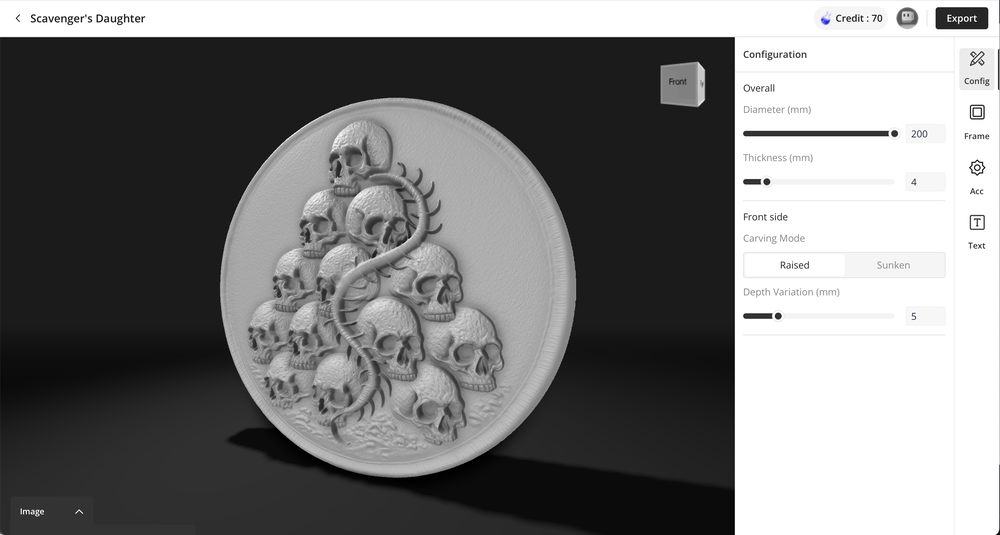
I took that image into Pixelmator and removed the background around the patch, then headed over to Maker World's Relief Sculpture Maker. That generated a sculpture that I could 3D print.
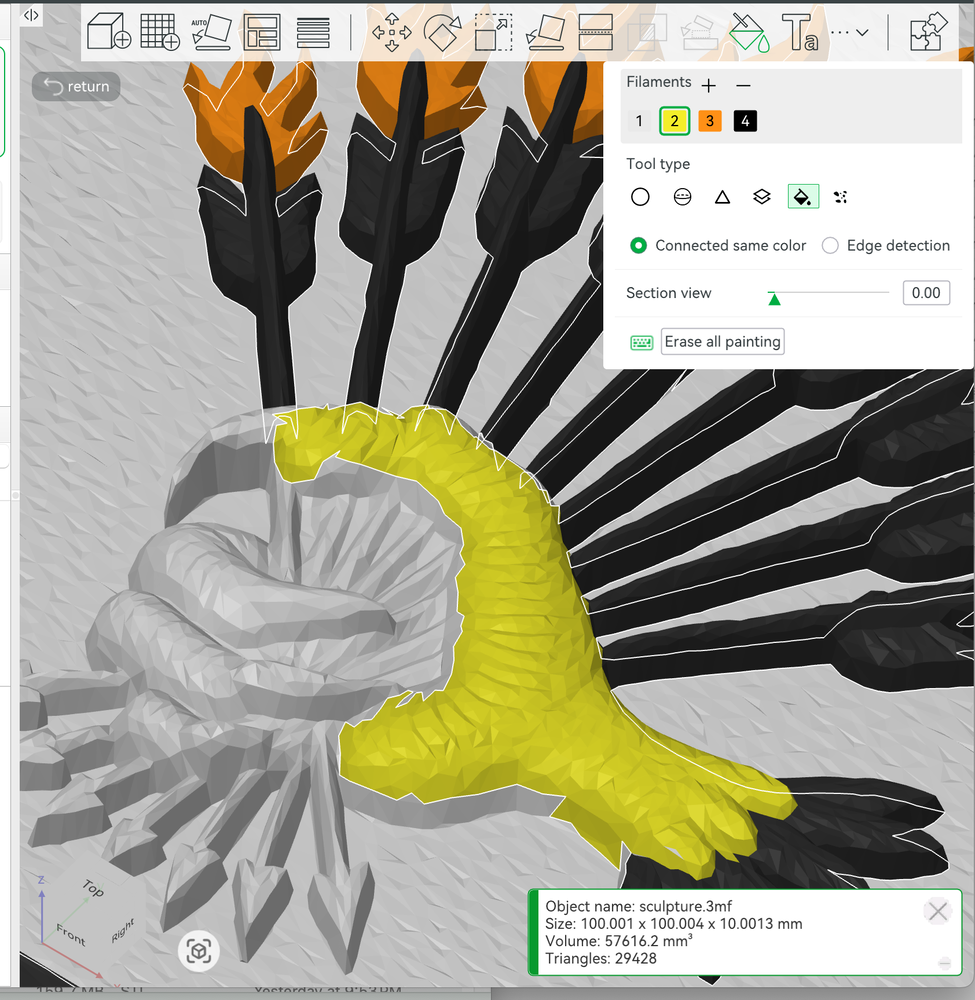
I then opened that file in Bambu Lab's software and began the process of painstakingly coloring in the file. I say "painstakingly" because it was tedious, but honestly, it was a lot of fun.
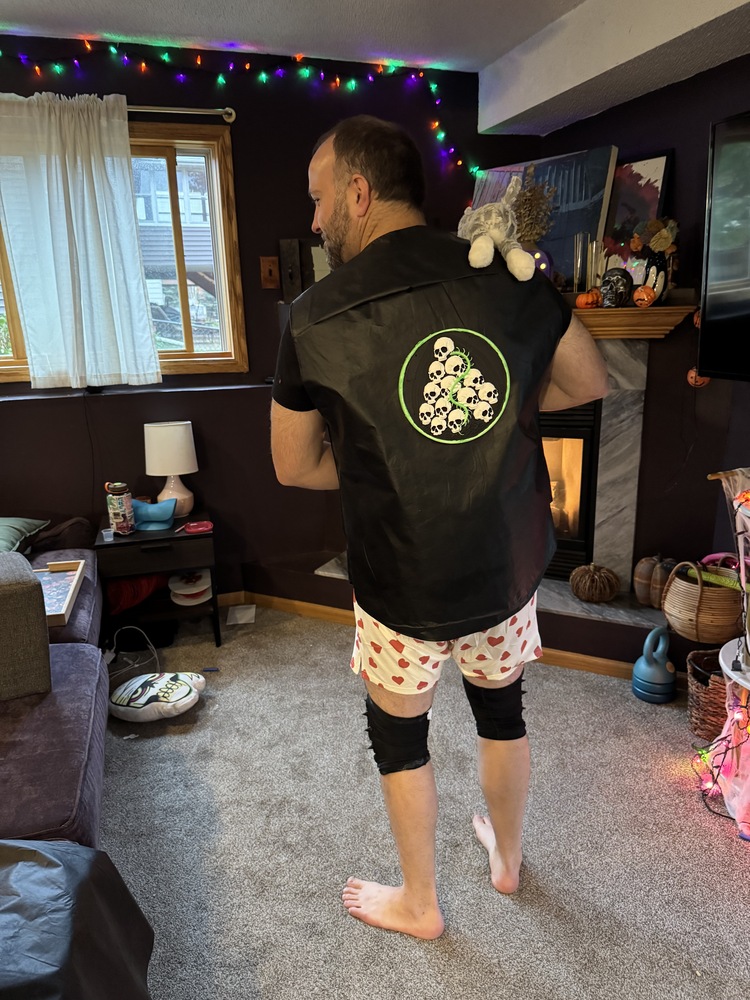
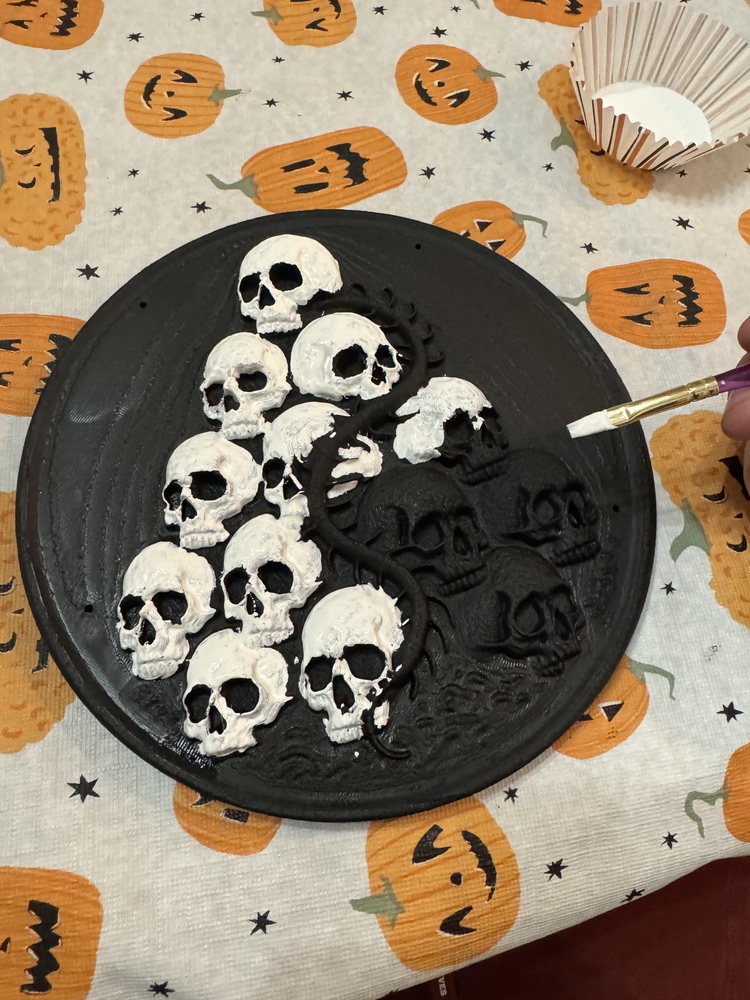
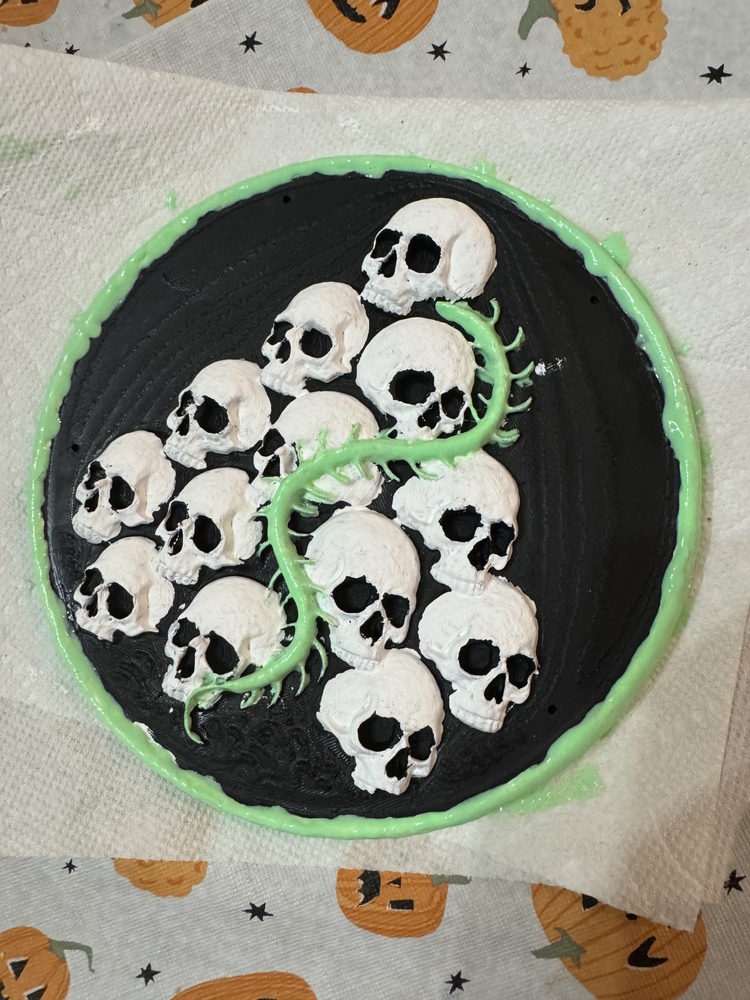
The highlight of this vest for me was the Scavenger's Daughter patch, a massive back patch featuring a pile of skulls and a centipede crawling amongst them. I printed the patch out in white PLA, spray painted it black, then hand painted each skull with white acrylic paint. I then painted the centipede and the border with green glow-in-the-dark paint.
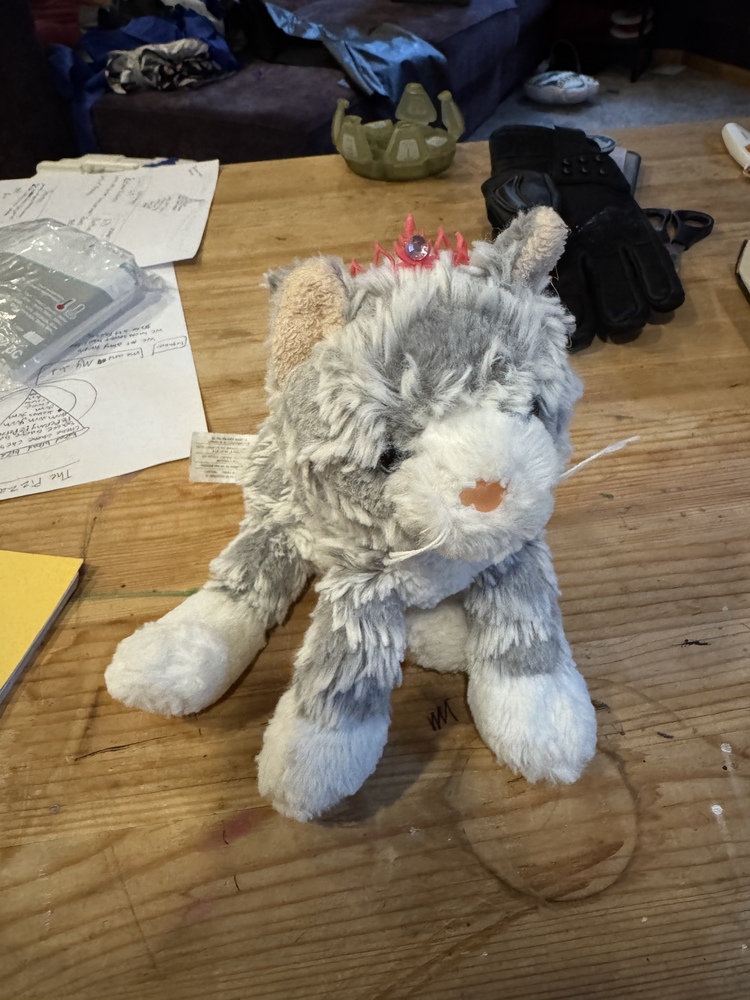
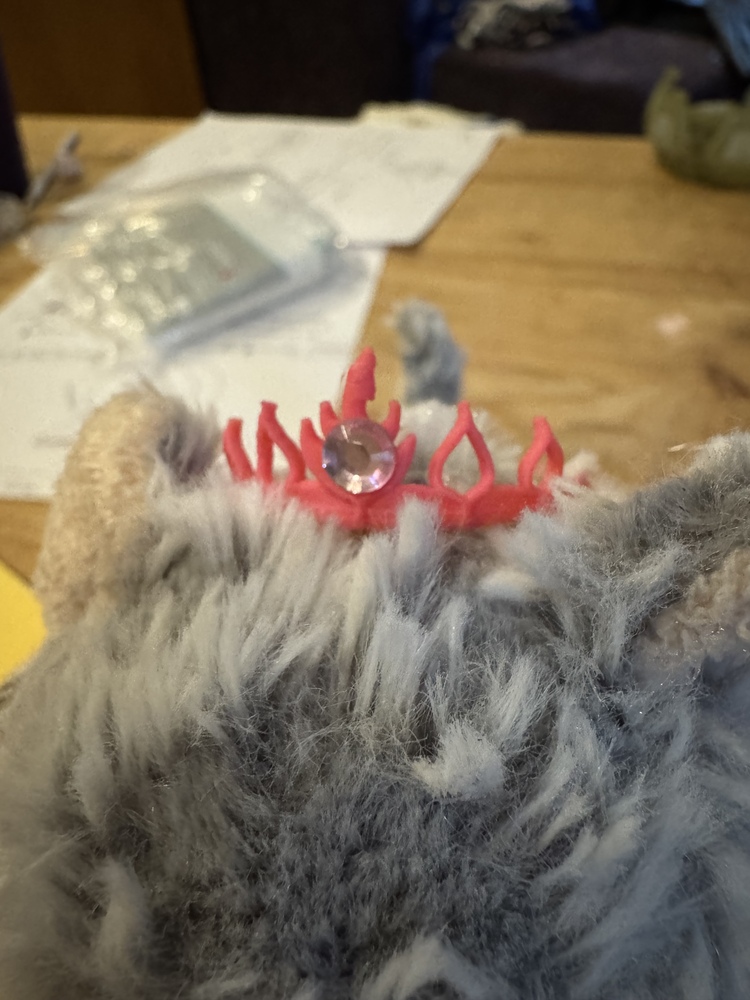
Also, I couldn't be Carl without Princess Donut, which my daughter helped me out by loaning me one of her cats and selecting a gem for her tiara.
Random lessons learned
I said the coloring process was painstaking, but I came to enjoy the tedium of learning new software. My first patch (the earth patch) was pretty terribly colored in and took around 90 minutes. It took me a few iterations of experimentation to learn you could simply click and drag across the interface to color in a bunch of sections at a time. By the time I got to my last patch, it took maybe 30 minutes of coloring?
Hand-painting the Scavenger's Daughter patch taught me that acrylic paint sucks to work with. You'd go to spread the paint with a brush, and the paint would glob together onto the brush and get dragged around like a screaming toddler in Target. I started to feel a little more confident using it after I got the glow-in-the-dark paint going, but still, I think I'd aim for a different type of paint next time.
The spikes for the knee pads were a massive flop for me. I printed out 24 cones in white PLA and intended on spraying them with silver spray paint. Here's the before and after:
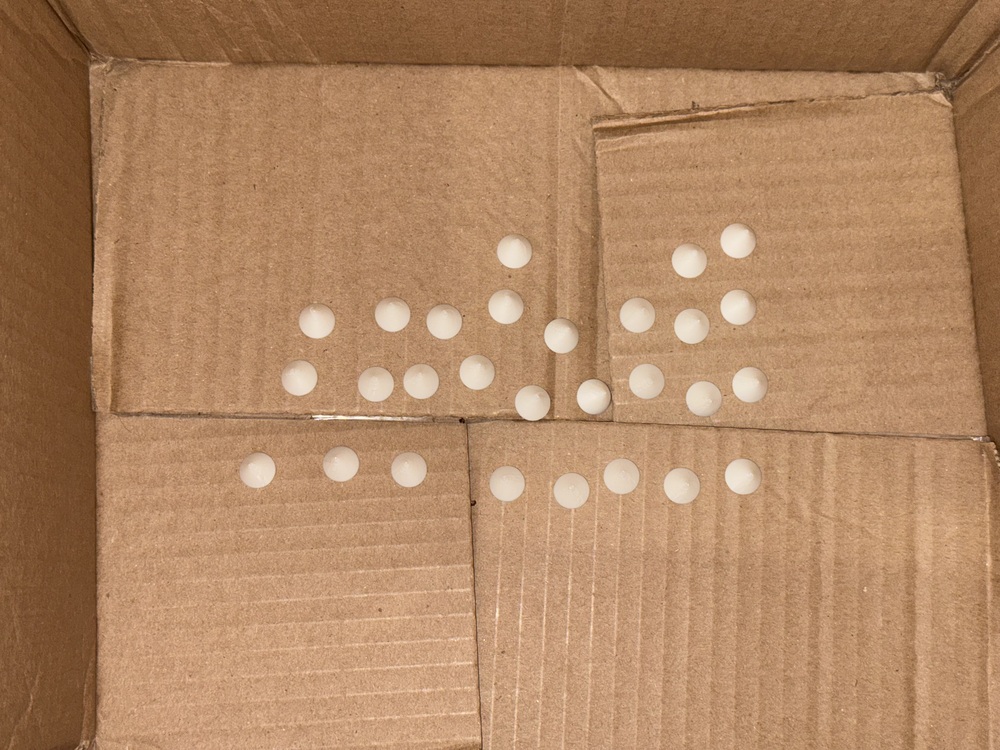
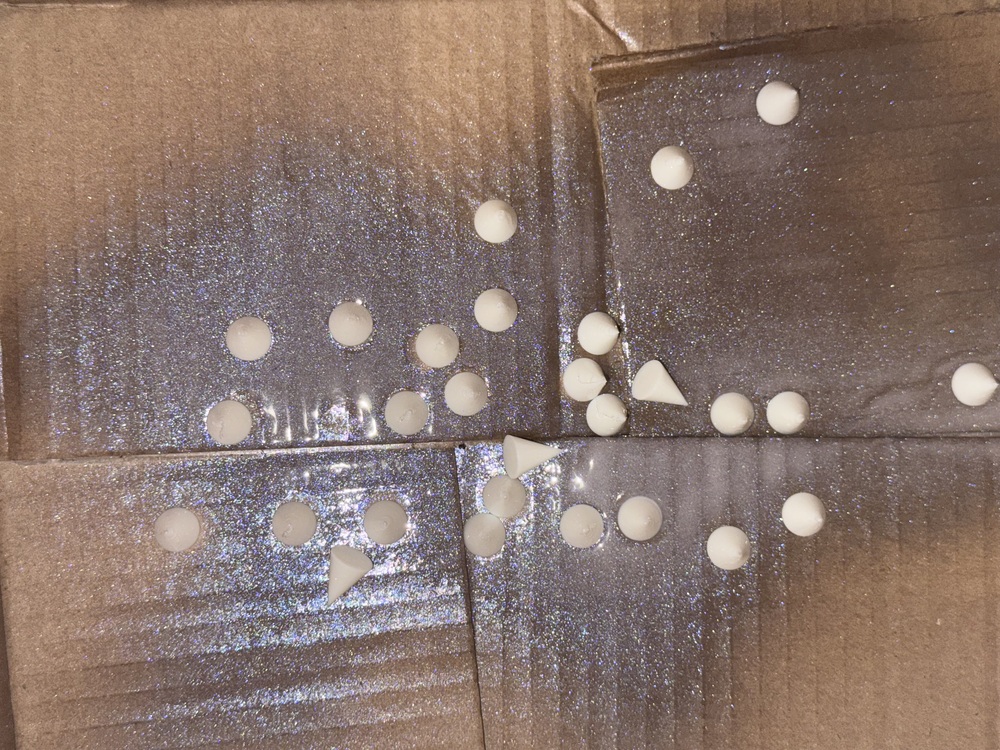
When I sprayed down on these cones, they would get blasted across the box. None of them ended up having any paint on them, unless the paint was supposed to be transparent with glitter, in which case why not just dump glue on them and dump my own glitter on them?
For months, I would go to print something with my black PLA only to have it result in failure like this:
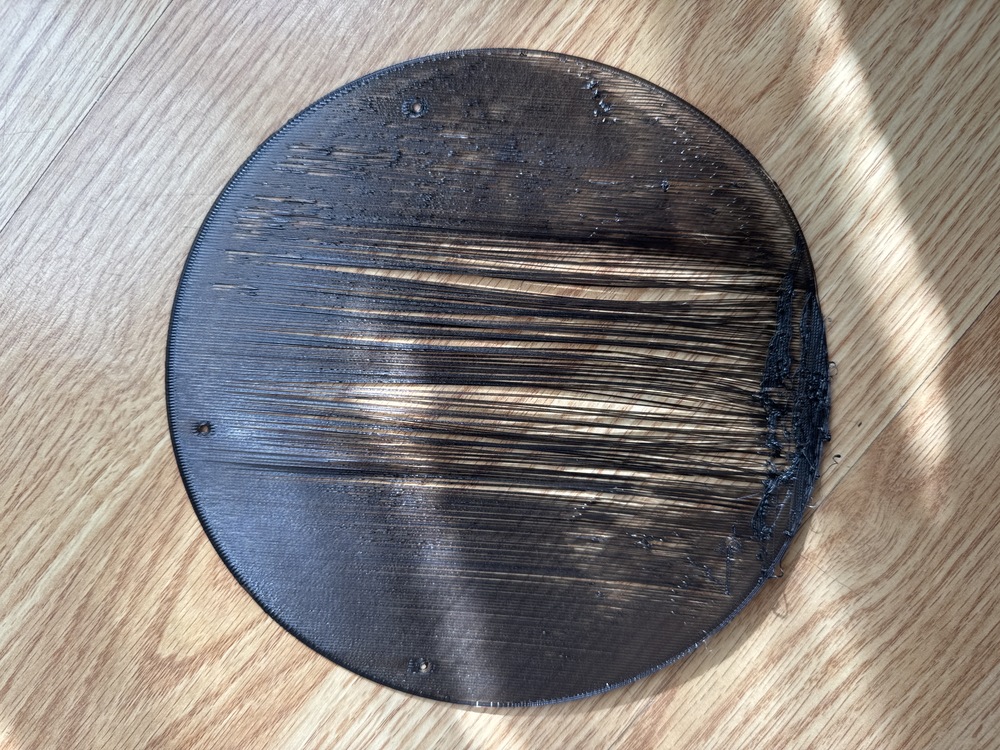
It turns out that this was not PLA, but PETG. So many wasted prints...
It also turns out that picking this costume, which features short sleeves, no pants, and nothing on the feet, is not a very conducive costume for trick-or-treating in Minnesota.
Finally, I do wish I would've started earlier. I only got 5 of the 8 patches that Carl wears on his vest, and it would've been fun to get the last three done on time.
But hey, I had a blast making this thing, I learned a ton about painting and 3d printing and sewing, and I can't wait to try again with a different idea next year!